User Data Backup Tutorial
Introduction
In this tutorial we will look into how to backup your work data using 2BrightSparks' SyncBackFree program and a USB portable hard drive.
To make a long story short, click here for a summary of the backup procedure outlined in this tutorial.
I use the acronym "PC" (personal computer) a lot in this tutorial, it refers to any device running Microsoft Windows (desktop PC, laptop, tablet). I also use the terms "user data", "work data" or "your data", this refers to the stuff you create such as Word documents, Excel spreadsheets, photos images, email messages. If disaster strikes your PC, operating systems like Windows 10/11 or programs such as Microsoft Office can be reinstalled. If disaster strikes your PC and your work data is not backed up, it can not be restored and so is lost forever. This is why a backup is important and running a backup on a regular bases is important.
Who is this Tutorial for?
This tutorial is for customers where I have installed SyncBackFree and a backup profile on their PC. I have written an article for those who want to install SyncBackFree for the first time: Installing SyncBackFree
Running a backup is a crucial process for securing your important files. Running a backup can also be a tedious process. So I have tried to make this process as easy and convenient as possible.
What gets backed up you ask?
Your Windows Users account folders (C:\Users\<User Name>) which includes:
- AppData folder (hidden)
- Desktop folder
- Download folder
- Documents folder
- Music folder
- Pictures folder
- Video folder
- Email messages and contacts
- Web browser configuration
What does not get backed up:
- Installed programs
- Windows operating system
Windows programs can not be completely backed up nor can the Windows operating system. If your PC experiences a crash due to hard drive failure or system corruption, your PC will need its Windows operating system reinstalled along with all your required programs and then restore your work data from backup.
Now the question is, 'If your PC suddenly fails would you miss the information on it?
If you answered yes then running a backup is for you. If your answer is no then you do not need to worry about this tutorial.
The next question to ask yourself is how much data loss are you willing to accept in a worst case scenario? A two week loss, a one week loss, a one day loss? How you answer this question will tell you how often you need to run a backup. For instance, if you think you can manage a one week loss of data then you should run a backup once a week.
Backing up Your Work Data
Before plugging in your USB backup drive ensure that all programs are closed. Open programs can cause backup errors and may not backup all your files.
- Quit out of all programs
- Plug in your USB backup drive.
- Wait for the USB backup drive to mount. You will see a notification appear on the desktop saying the drive is ready.
Here are various notices that may appear on your desktop to let you know the drive is ready to use: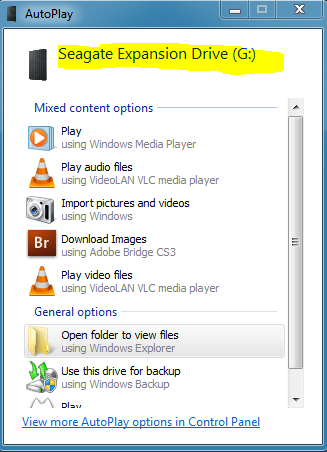
Fig 1. This is a Windows 7 USB mount notice
mounts with drive letter G:

Fig 2. This is a Windows 10 USB mount notice
mounts with drive letter D:
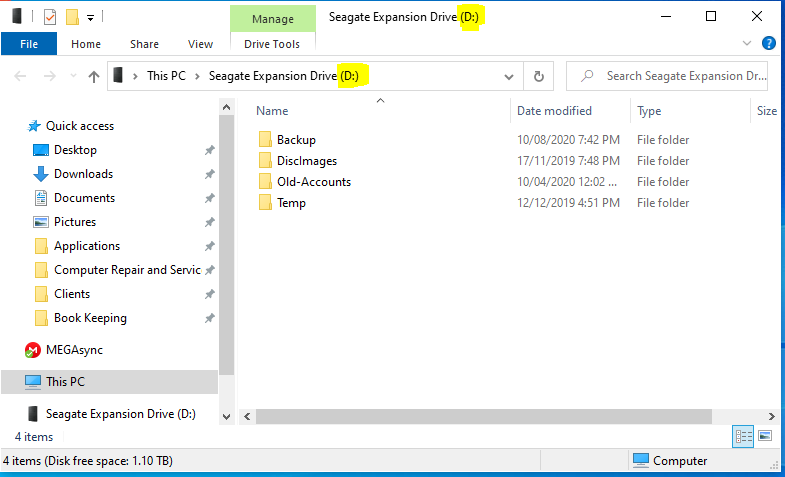
Fig 3. This is a Windows 7/10/11 USB mount notice.
Mounts with drive letter D:, auto runs Windows Explorer.
You can close this window before running SyncBackFree.
In each example above notice the drive letter assigned to the USB backup drive. When you plug in your drive make note of the assigned drive letter. This drive letter must match the drive letter in the SyncBackFree profile backup path (more on this after step 6).
- Launch the SyncBackFree desktop icon.
- Select "Yes" to the User Account Control notice.
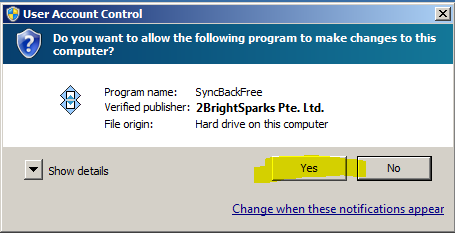
Fig 5. Selecting Yes gives SyncBackFree administrative privilege.
SyncBackFree will now appear on your desktop. The blue highlighted row is the backup profile. Your backup profile may look different from fig. 6 and you might have more than one profile.
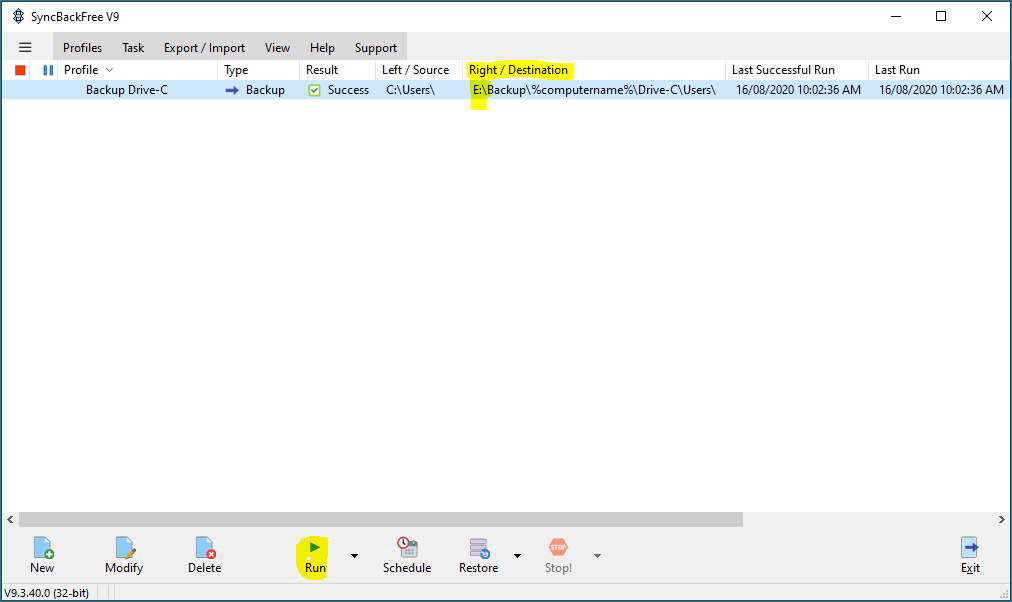
Fig 6. SyncBackFree is ready to start a backup session
In the backup profile note the drive letter in the "Right / Destination" path. Does it match the drive letter of your mounted USB backup drive? If it does you are ready to run the backup by selecting the Run button located along the bottom row of the SyncBackFree window.
If the drive letter does not match you may have another USB storage device plugged into your PC. Remove all USB storage devices then try plugging in your USB backup drive again. If that does not do it, select the Modify button located in the bottom row of the SyncBackFree window and change the drive letter in the Destination path.
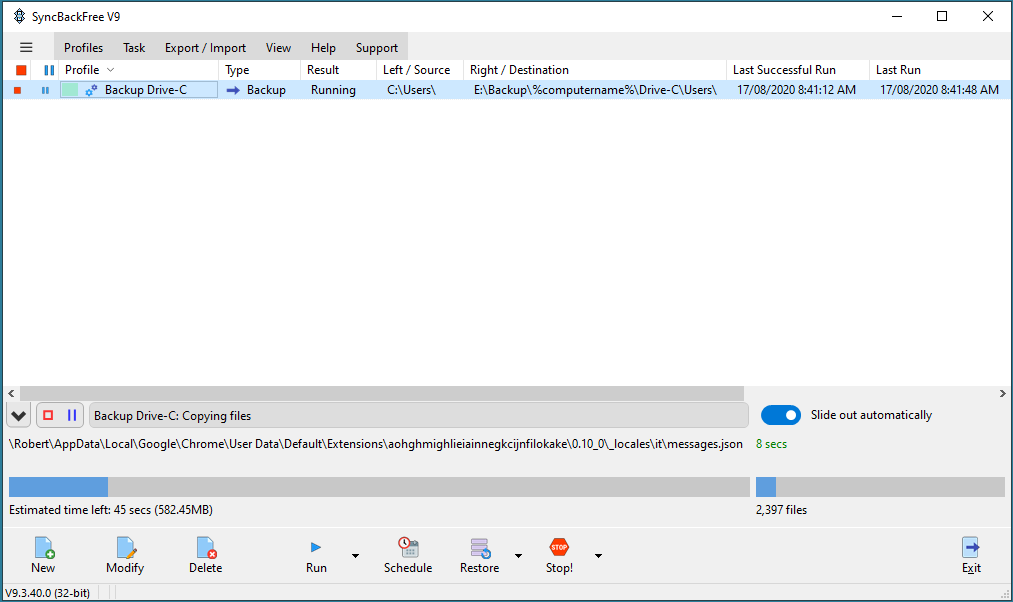
Fig 7. SyncBackFree is running the backup profile
It is recommended not to use your PC while SyncBackFree is running a backup profile. If this is a first time backup (no files or folders in the USB backup drive), the backup may take a long time to complete. All your work data from your PC will need to be copied to the USB backup drive. The next time you run a backup it will only backup data that has changed or has been added since the last backup.
When the Backup finishes you should see "Success" in the Result column.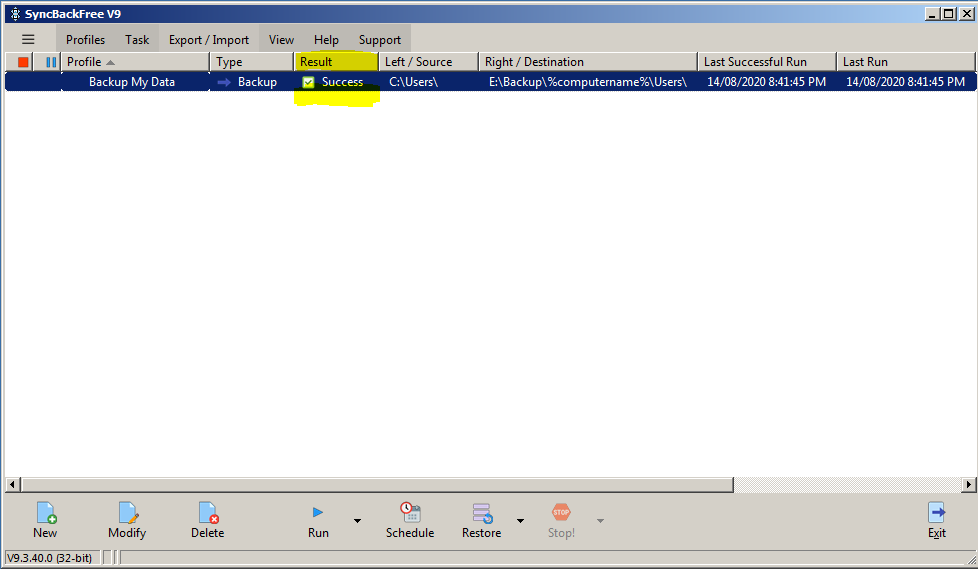
Fig 8. A successful backup
- Close the SyncBackFree program.
- Eject your USB portable hard drive.
![]()
Fig 9. Select the USB eject icon and then select your USB backup drive from the list
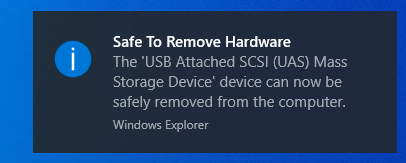
Fig 10. Your USB portable hard drive is now safe to remove from you PC
Backup is complete.
More backup information is available in our next article: User Data Backup Part 2
Summary of Backup Steps
- Quit out of all programs.
- Plug in your USB portable hard drive.
- Open SyncBackFree.
- Select your backup profile (might already be selected).
- Select the "Run"
button located along the bottom row of the SyncBackFree program.
- Once the backup is done quit out of SyncBackFree.
- Eject your USB portable hard drive and disconnect the usb cable from the PC.
- Keep the USB portable hard drive near your PC (visible) to remind you to backup.
Need more help? Click here to return to the top of the page.
