Installing SyncBackFree
SyncBackFree by 2BrightSparks is a Microsoft Windows based backup utility.
In this article we will show you how to set-up SyncBackFree to backup your work data (personal files).
Download and install SyncBackFree from the above link. Once SyncBackFree is installed you will be ready to import a backup profile.
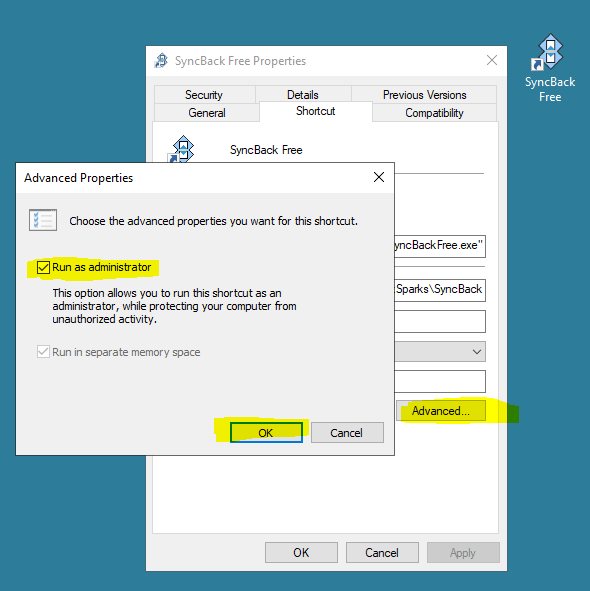
Before you launch SyncBackFree for the first time set the SyncBackFree icon to "Run as Administrator".
- Right mouse click on the SyncBackFree icon and select Properties --> Advanced button.
- Select check box "Run as administrator".
- Select OK and OK.
With SyncBackFree set to run as Administrator gives it the ability to backup multiple Windows user accounts.
Download SyncBackFree Profile here: SyncBackFree Profiles
Four profile are in a archive file named: SyncBackFreeProfiles.zip
Extract the zip file to gain access to the four profiles:
- Backup My Data (Network).sps
- Backup My Data.sps
- Mirror My Data (Network).sps
- Mirror My Data.sps
The most common profile to use is "Backup My Data.sps".
- Launch SyncBackFree and select the "Export/Import" tab then the "Import Profile" button.
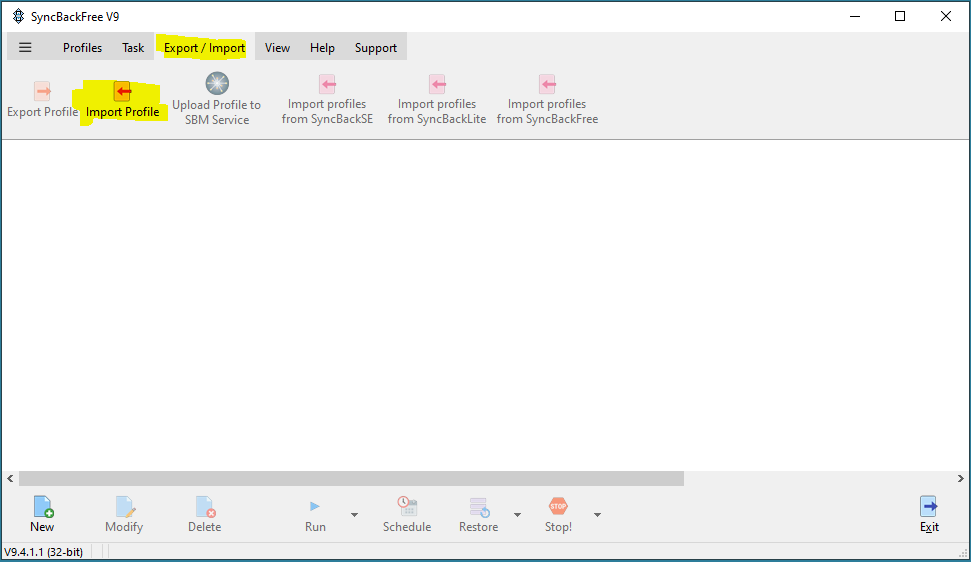
Fig 1. import a backup profile.
- Navigate to where you extracted the profile archive and select the "Backup My Data.sps" profile.
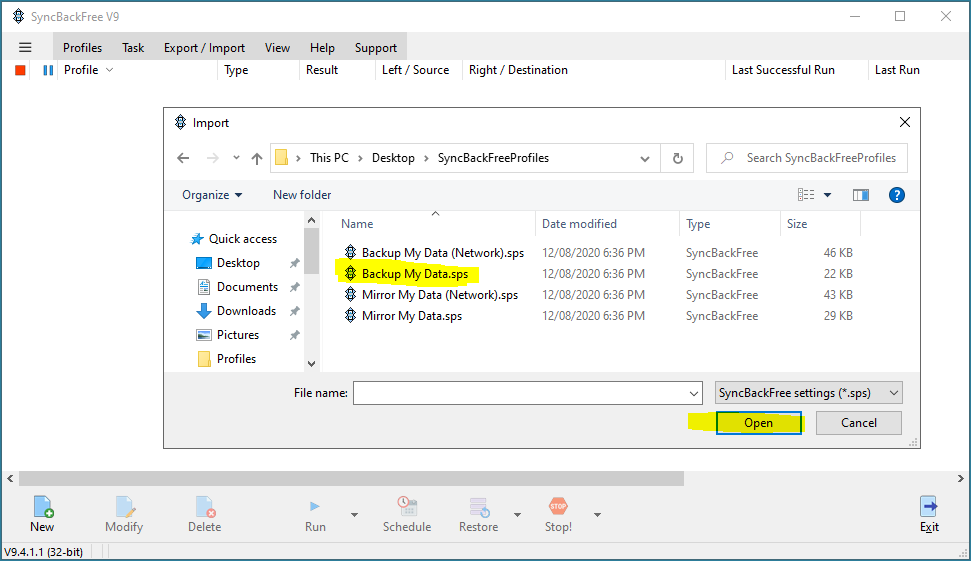
Fig 2. select a backup profile.
- Select the Modify button and change the drive letter in Destination to match your USB portable hard drive's drive letter if it is something other then E:.
- Select the "Choose sub-directory and files" button.
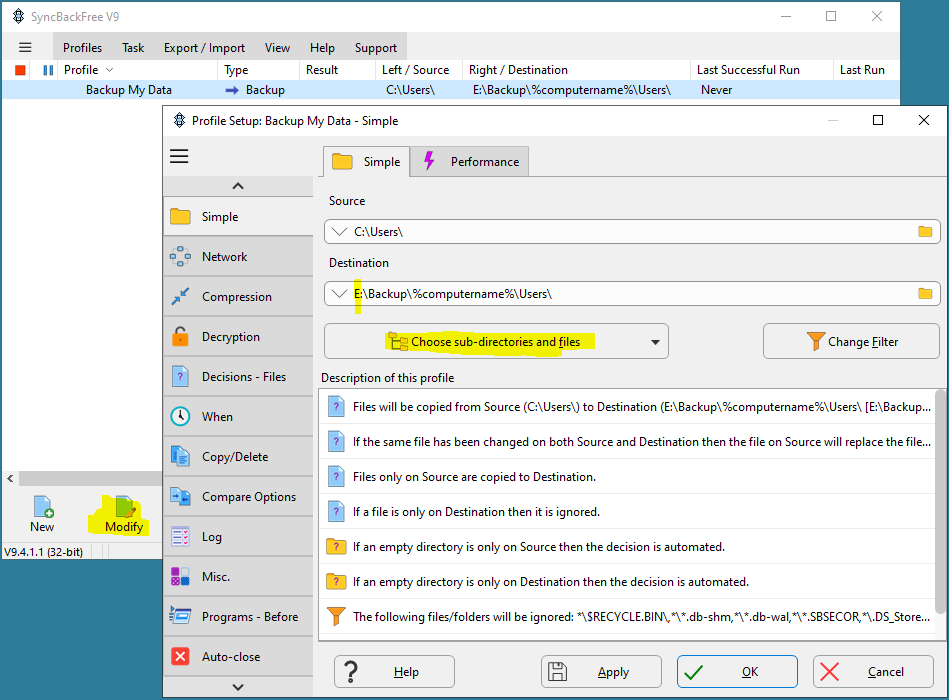
Fig 3. Configure backup profile.
- Select the Broom icon to remove any extraneous entries (they will appear in red).
- Select your username folder(s) (the Public folder will already be selected).
- You can ignore the "Default" folder and uncheck any other folder(s) that are not associated with your user accounts.
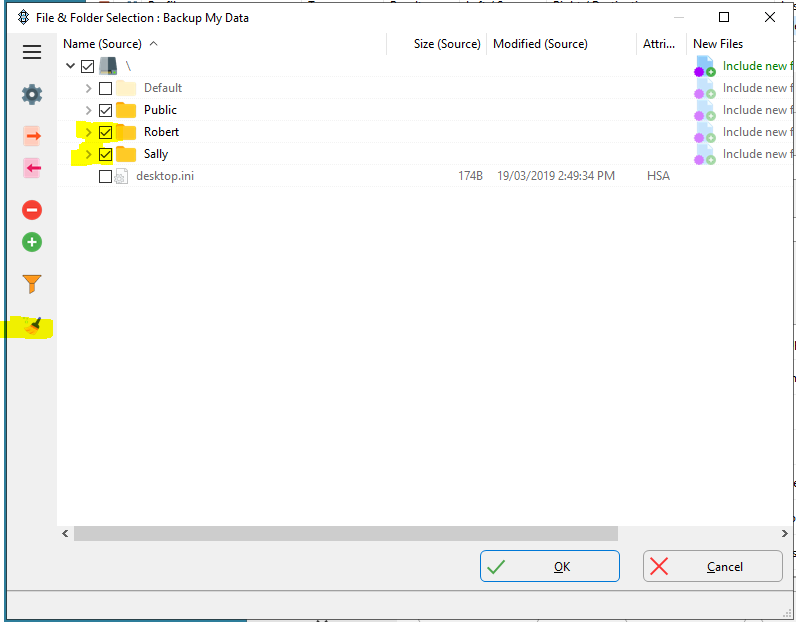
Fig 4. Adding Windows users to the profile.
This profile and the other profiles in the archive have been pre-configured to exclude files and folders that can not be backed up and files and folders not needed to be backed up. Most errors will occur in the %LocalAppData% folder for each Windows user. You can exclude these in the "Choose sub-directory and files" area (fig 4). Common errors that occur across multiple Windows users can be added to the "Change Filter" area. Web browser cache and other program caching is excluded from the backup.
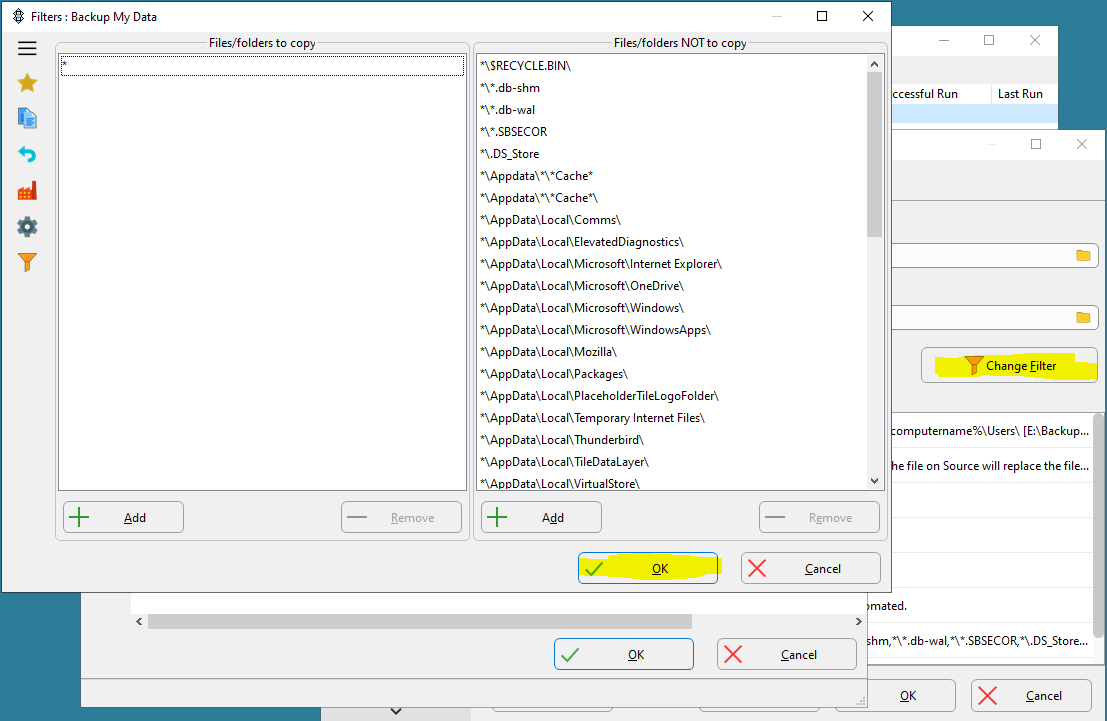
Fig 5. SyncBackFree profile filter.
You are now ready to run the backup profile
- Quit out of all running programs.
- Attach your USB portable hard drive.
- Wait for the drive to mount.
- Confirm that the mounted drive's drive letter is the same as the drive letter in your backup profile Destination path (fig 3).
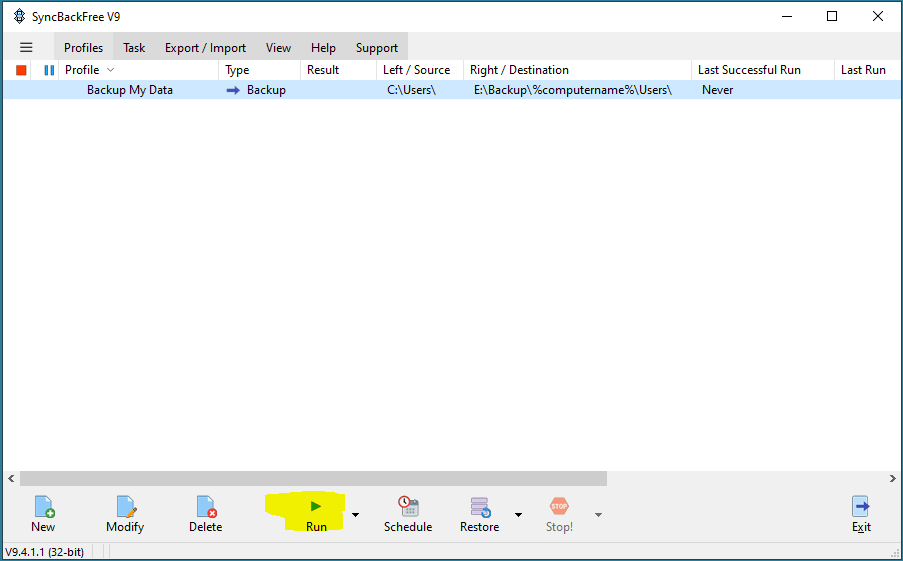
- Select the Run button.
That's it. Your backup should run error free. When the backup finishes you should see Success in the Result column.
For more information on running a backup see articles User Data Backup and User Data Backup Part 2.

