Remote Desktop for Multi Users
Lets have a look at Microsoft's Remote Desktop Connection utility.
Read more about Remote Desktop Protocol and Remote Desktop Services.
Enable Remote Desktop in Windows 10 or 11
On your PC you will need to be running either Windows 10 or 11 Professional.
Enable Windows 10 Professional Remote Desktop
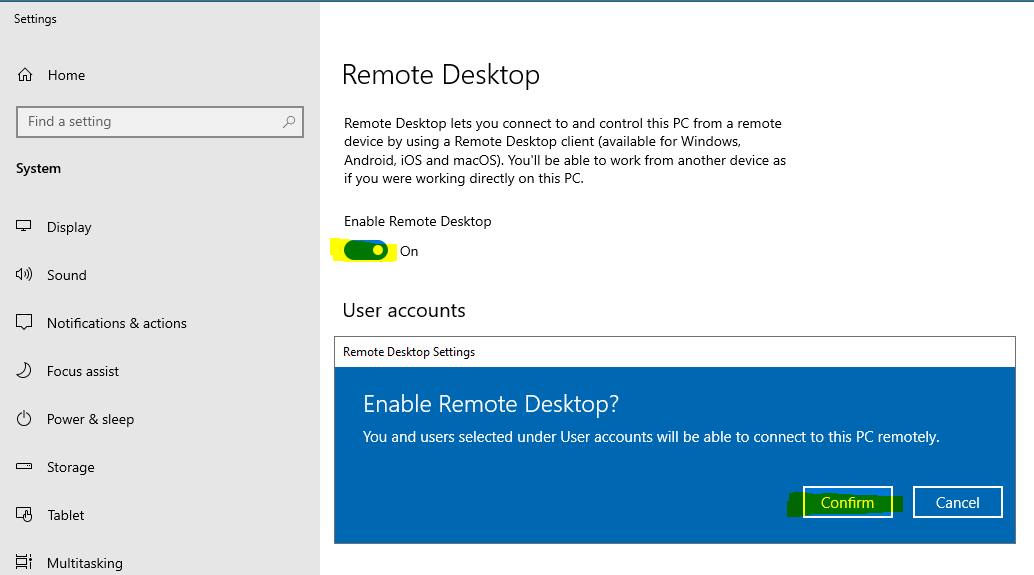
Navigate to: Settings --> System --> Remote Desktop
Turn on "Enable Remote Desktop" and select Confirm.
Enable Remote Desktop in Windows 10
Enable Windows 11 Professional Remote Desktop
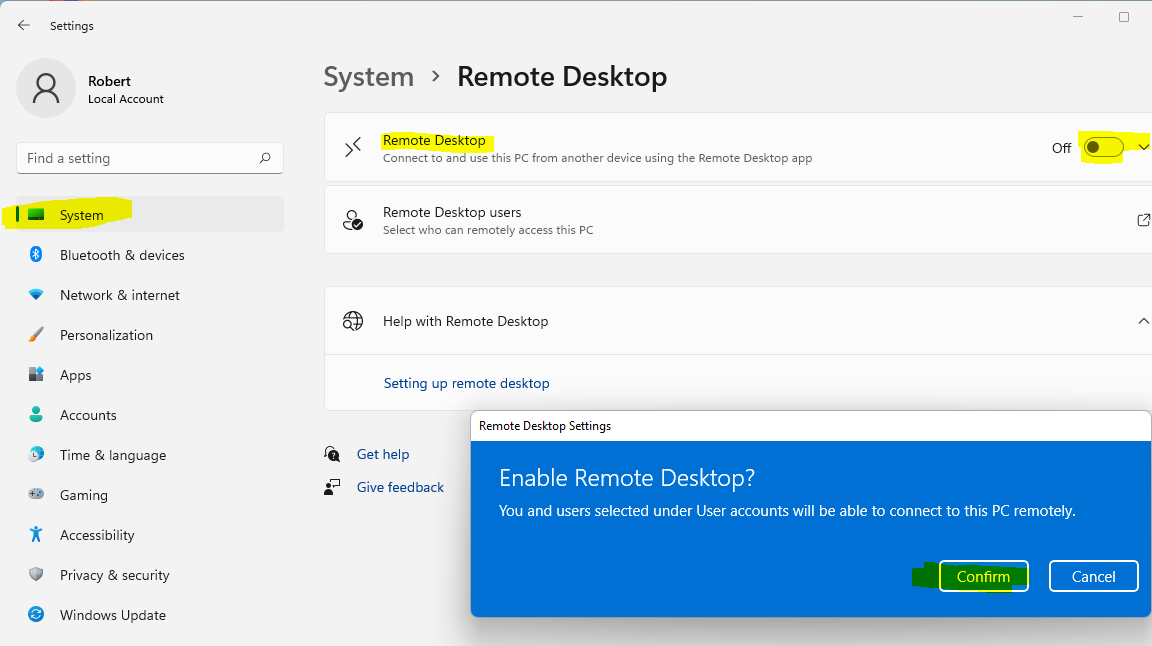
Navigate to: Settings --> System --> Remote Desktop
Turn on "Enable Remote Desktop" and select Confirm.
Enable Remote Desktop in Windows 11
Add a Remote Desktop User
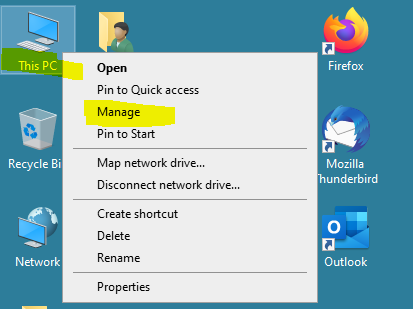
Right mouse click on the "This computer" desktop icon and select "Manage".
Quick access to the Windows Management utility
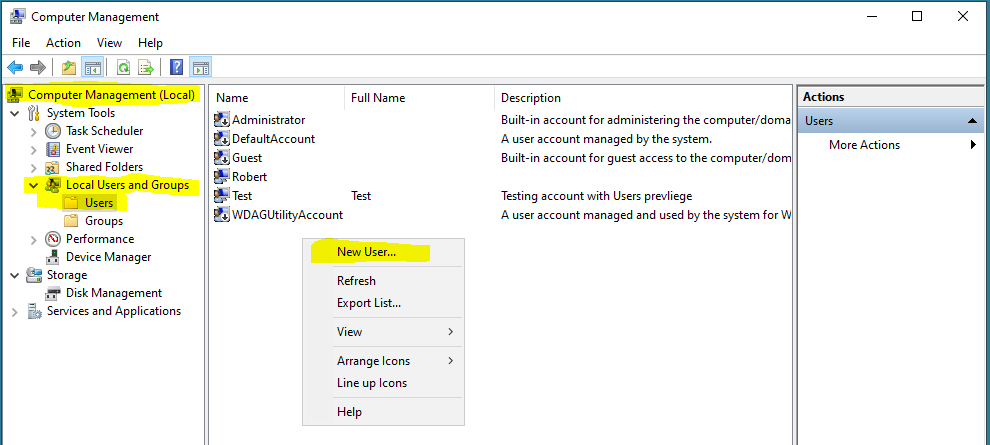
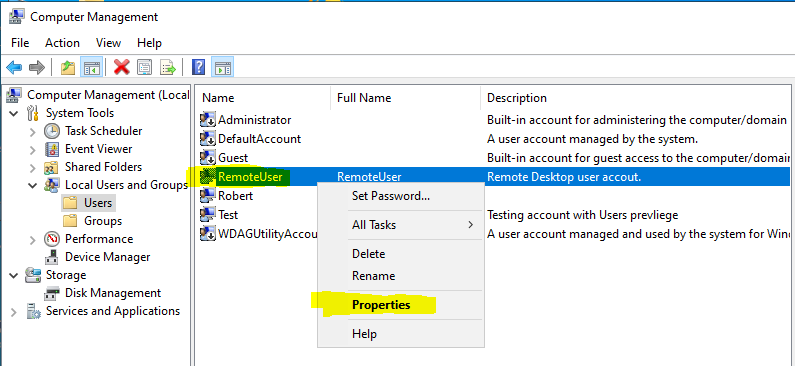
Navigate to: Computer Management (local) --> Local Users and Groups --> Users
In the middle panel right mouse click and select "New User..."
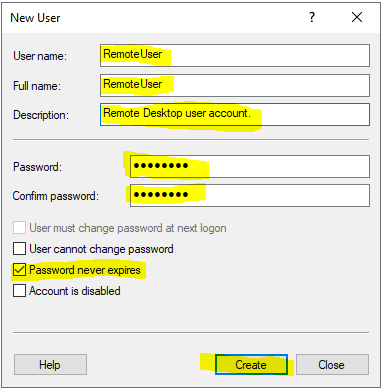
Fill in the "User name:", "Full name:", "Description:" and Password fields.
Un-check "User must change password at next Logon" box.
Check "Password never expires" box.
Select Create.
Create a new Windows 10 user profile
Re-open your newly created user.
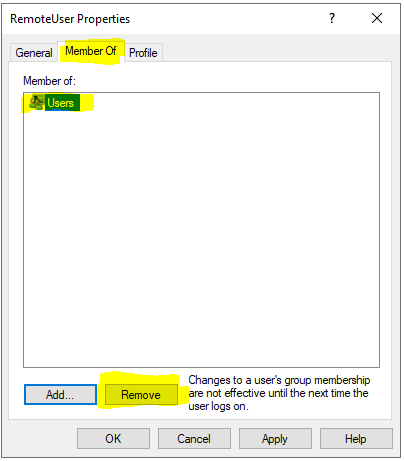
Select the "Member Of" tab, "Users" and the "Remove" button.
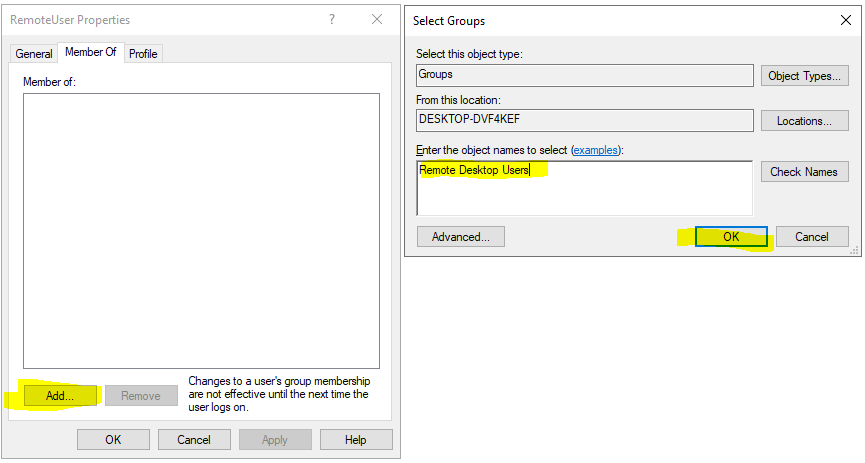
Select "Add" and enter "Remote Desktop Users" in the "Enter the object name to select" field.
Select OK to add.
Add a new member group to the user profile
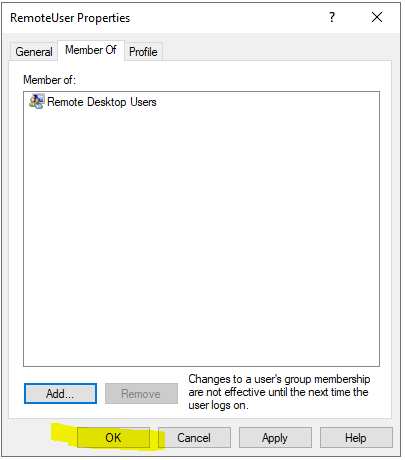
Select OK to update your new user.
Remote Desktop User member added to user profile
Your newly created Remote Desktop user is ready. Optionally, you can add the "Remote Desktop Users" group to an existing Windows user profile.
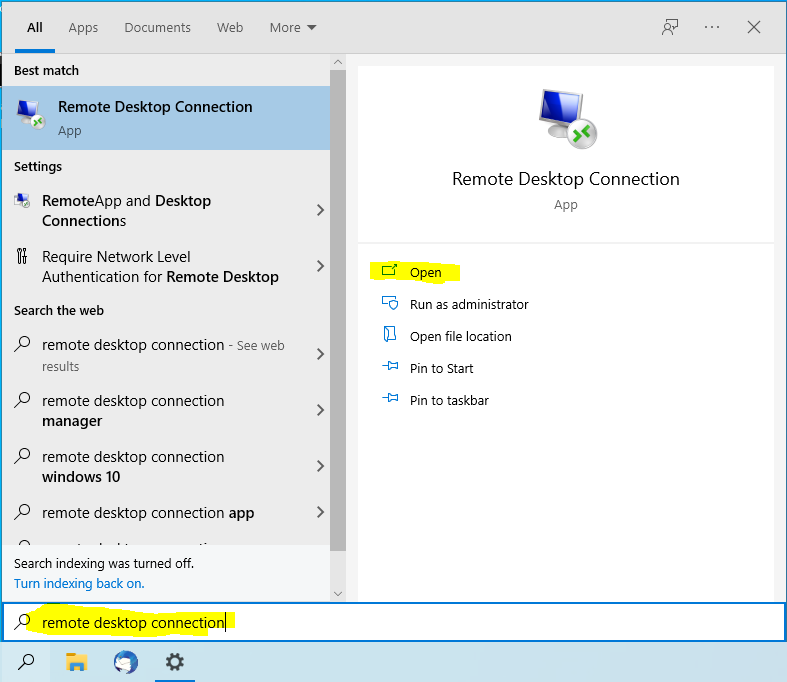
On another PC open the "Remote Desktop Connection" Utility.
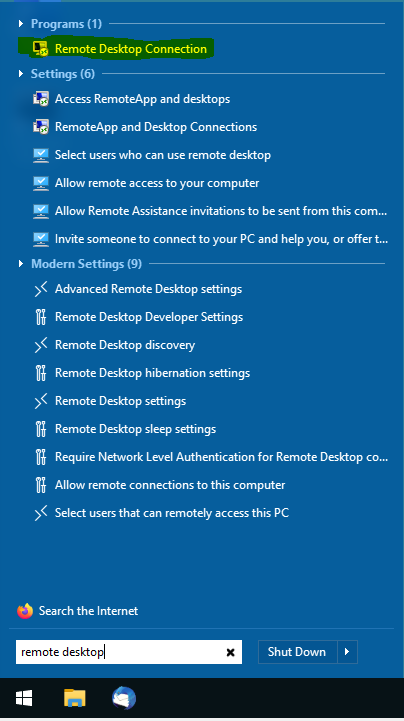
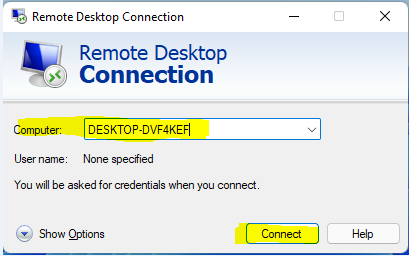
Remote Desktop Connection utility.
Enter the IP address or computer name of the Remote Desktop enabled PC. Both PCs must be on the same network, connected either by a Ethernet cable or a wireless (wifi) connection.
Select the "Connect" Button.
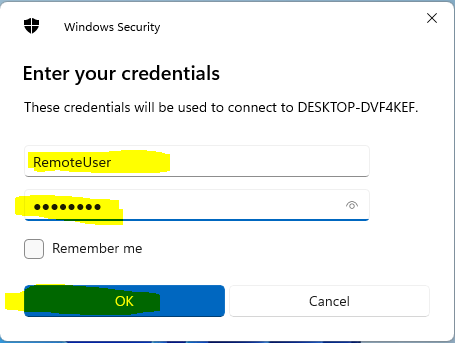
Enter the username and password you used to create the Remote Desktop User account.
Select OK.
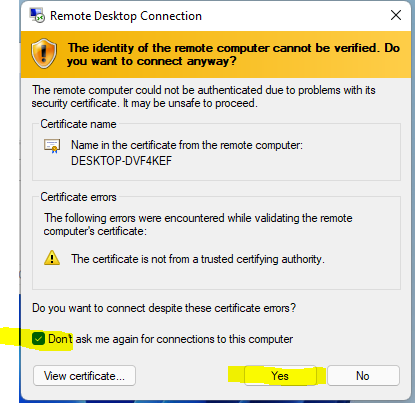
Un-check the "Don't ask me again for connections to this computer" box and select "Yes".
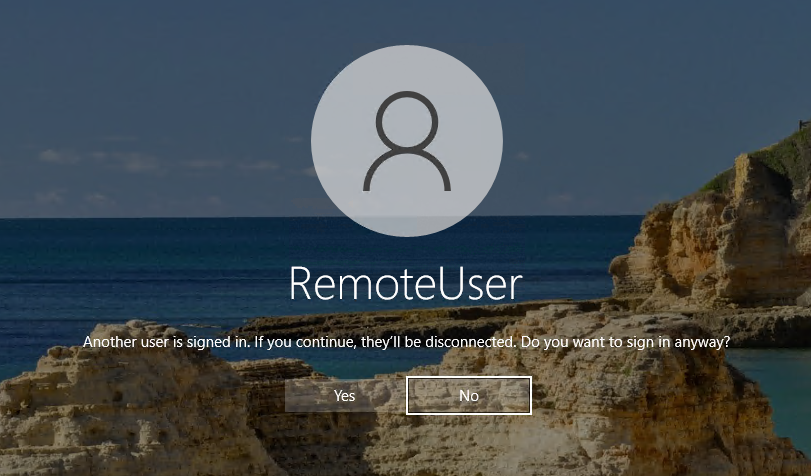
If you were still locally logged into the remote desktop PC, you will see this notice.
Only one user can login at a time.
Due to licensing, Microsoft limits one user to be logged on at a time. Oh no...
Enable Multi Windows Users
To enable multiple user logins a file named termsrv.dll located in C:\Windows\System32\ needs to be modified. However, there is problem with this approach. When Windows installs updates it may overwrite the termsrv.dll file reverting it back to it's defaults. So if a Windows update overwrites termsrv.dll, the system will revert back to a one user at a time login.
This is where RDP Wrapper comes into play. RDP Wrapper creates a layer over the termsrv.dll file making the necessary modifications to allow multiple user account logins without altering the termsrv.dll file.
RDP Wrapper has not been updated since 28 Dec 2017. As a result, RDPWrap fails in Windows 10 and 11. Fortunately, there has been an update to the autoupdate.bat file that resolves this issue.
I have added the updated autoupdate.bat file to the RDPWrap-v1.6.2.zip archive file and also included a Readme.txt file with installation and uninstall instructions. Download the updated archive file here: RDPWrap-v1.6.2 (20220311).zip
Install RDP Wrapper
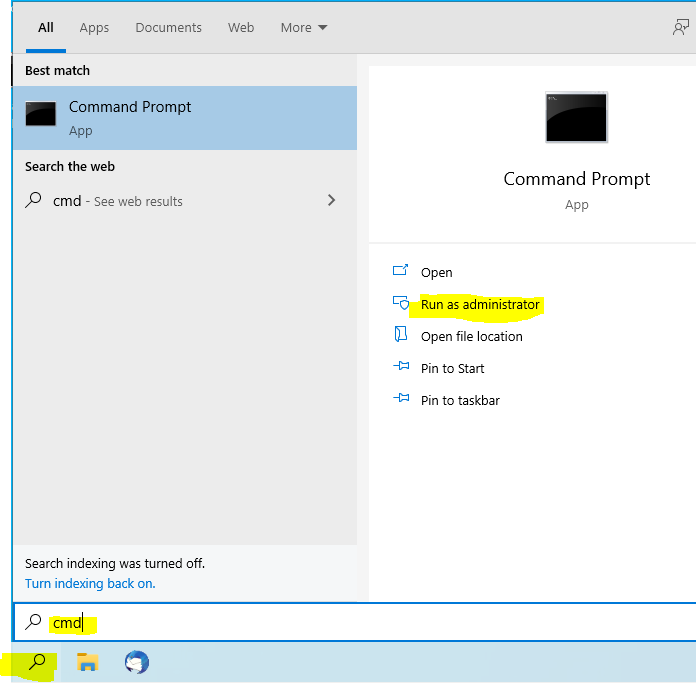
On the Remote Desktop PC, open a Command Prompt as Administrator.
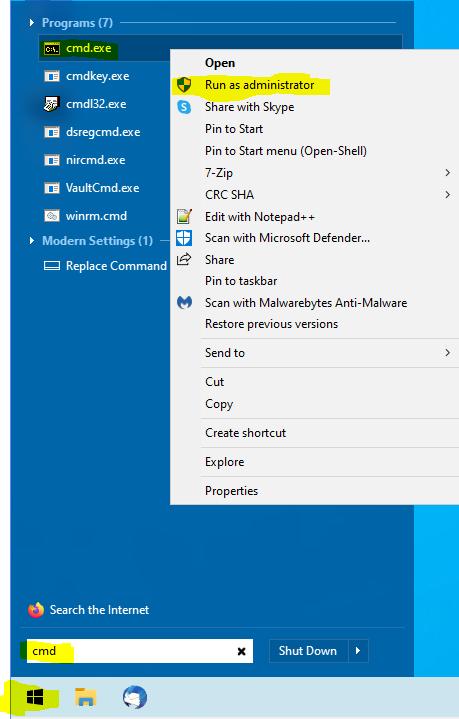
Open a administrator privileged command prompt.
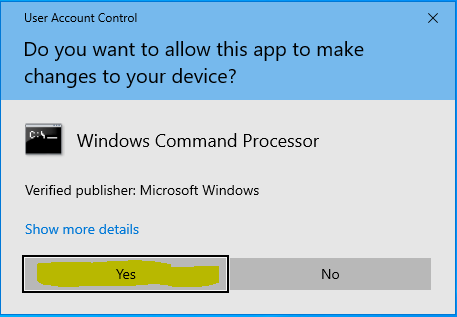
Select "Yes" to the "User Account Control" notice.
User Account Control verification.
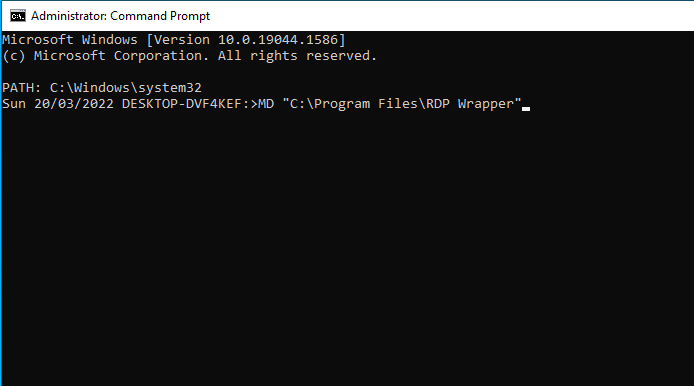
The Command Prompt will now appear on the desktop. Execute the following command:
MD "C:\Program Files\RDP Wrapper" <enter>
Create a new folder for the RDP Wrapper program.
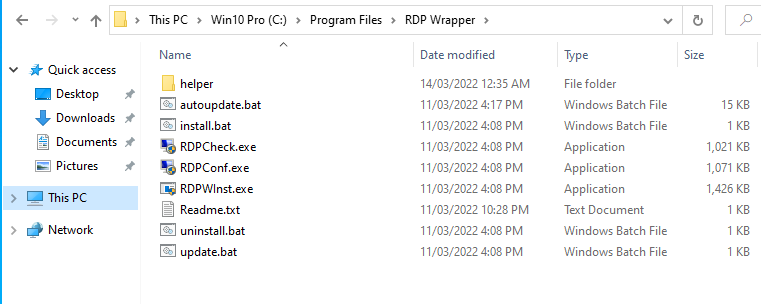
Extract all files in the RDPWrap-v1.6.2 (20220211).zip archive to folder "C:\Program Files\RDP Wrapper".
This can be done from Windows Explorer.
Once done the "C:\Program Files\RDP Wrapper" folder should look like this:
Back in the Command Prompt execute the following commands:
"C:\Program Files\RDP Wrapper"\helper\autoupdate__enable_autorun_on_startup.bat <enter>
"C:\Program Files\RDP Wrapper"\autoupdate.bat <enter>
(if the process appears to stall press the Enter key a few times.)
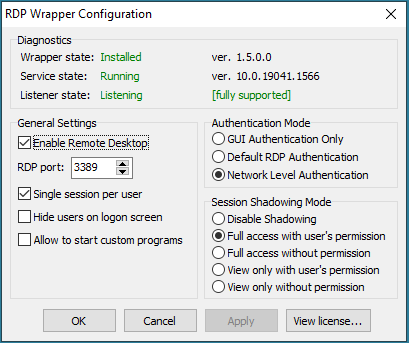
"C:\Program Files\RDP Wrapper"\RDPConf.exe <enter>
If all went well you should see this:
Test RDP Wapper.
If "Diagnostics" is all in green you are good to go!
Now try the Remote Desktop connection utility on the other PC again. This time you should log straight into the desktop.
For the initial login, the Windows user profile may take some time to install before the desktop appears.
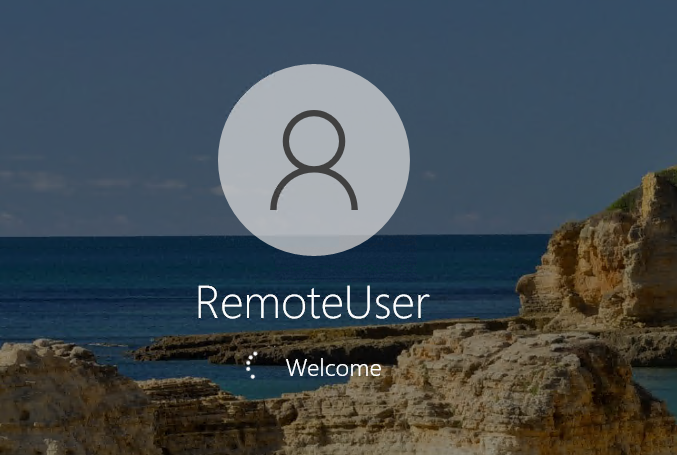
First time logon should look something like this:
Success! Multiple users can log into the remote PC.
Then your desktop will appear.
You can now add more "Remote Desktop Users" to the Remote Desktop enabled PC or add the "Remote Desktop Users" group to existing users as needed.
Note: Running RDP Wrapper on a PC does open vulnerabilities as does enabling Windows Remote Desktop (RDP). Your antivirus program may throw a false-positive and flag RDPWInst.exe as malware, riskware or a "Possible unwanted Program" (PuP).
An exception can be set for this file in your antivirus program (path: "C:\Program Files\RDP Wrapper\RDPWInst.exe").
In the next article we will look at how to access the Remote Desktop PC from the Internet and how to secure it.

