MacOS Maintenance
This should be a short article...well sort of. Unlike Microsoft Windows PCs there is not a whole lot of system maintenance required for your Mac PC or Mac Laptop. No worries about defragging a hard drive or running antivirus scans. None of that is needed. A monthly system cleaning and a regular backup schedule will do the job.
In this article we will look at two utilities for cleaning and backing up your Mac.
- OnyX
- Time Machine
System cleaning using OnyX
OnyX is a MacOS utility that will help maintain your Mac's good health. OnyX is donationware (freeware) and can be downloaded at:
https://titanium-software.fr/en/onyx.html
Download the version of OnyX that matches your version of MacOS or OS X.
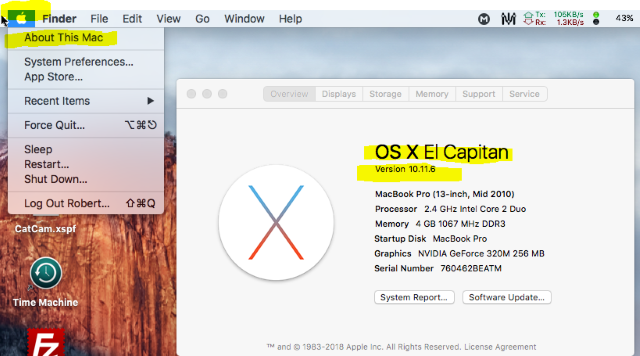
My aging MacBook Pro is running OS X El Capitan version 10.11.6
Since I am running El Capitan I will go down the list at Titanium Software OnyX page and select OnyX version 3.1.9.
This is the correct version for my MacBook Pro
Download the version of OnyX that matches your MacOS. After the download has completed navigate to the Download folder and locate the installation file.
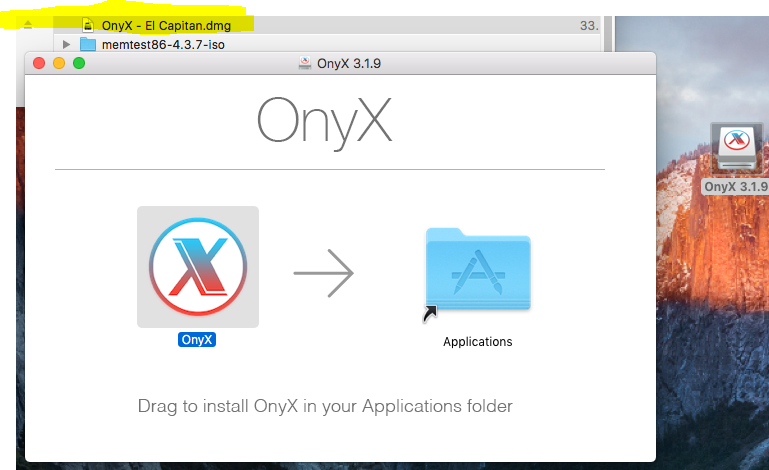
(my downloaded installation file is named "OnyX - El Capitan.dmg").
Open the .dmg file, the following window will appear:
Your installer window may look slightly different
To install OnyX drag and drop the OnyX icon over the Application folder. Once OnyX copies into the Application folder you can close the installer window and eject the OnyX desktop installer file. Eject the installer file by either right mouse clicking on the installer and select Eject or drag and drop the installer into the desktop Trash Bin.
Open Onyx: Select Go --> Applications --> OnyX
Before opening the OnyX application you can optionally drag and drop the OnyX icon onto your Dock or create an alias (shortcut) and drag and drop it onto the desktop.
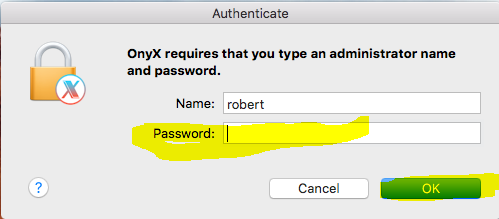
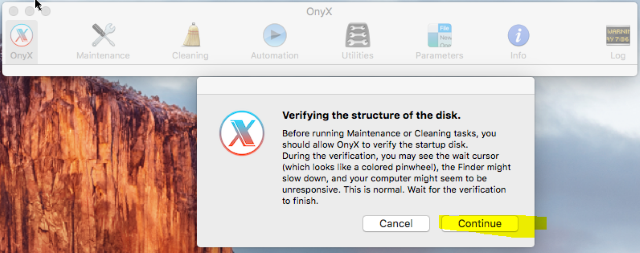
Older versions of OnyX for OS X will prompt you for authentication and for a "Verify Disk Structure" check before the main program window appears on the desktop.
Newer versions of OnyX bypass this procedure and will open in the main program window.
Enter your login password and select OK.

Disk structure verification in progress. This can take a few minutes.
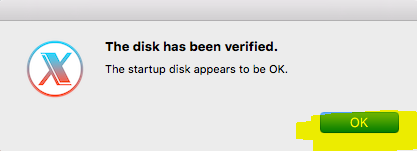
Verification complete, select OK to continue.
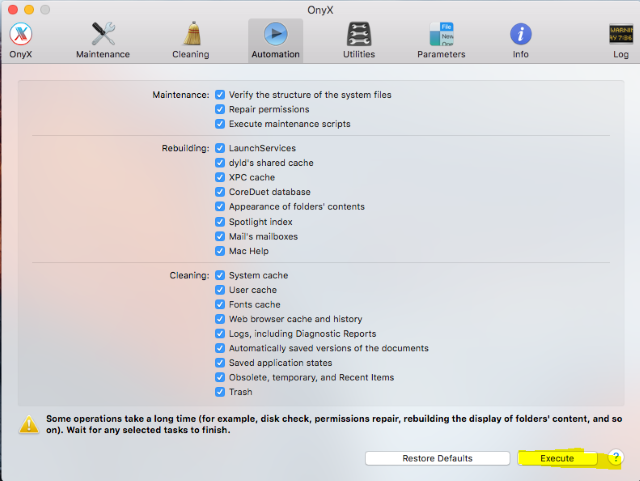
This is for older Macs running OS X
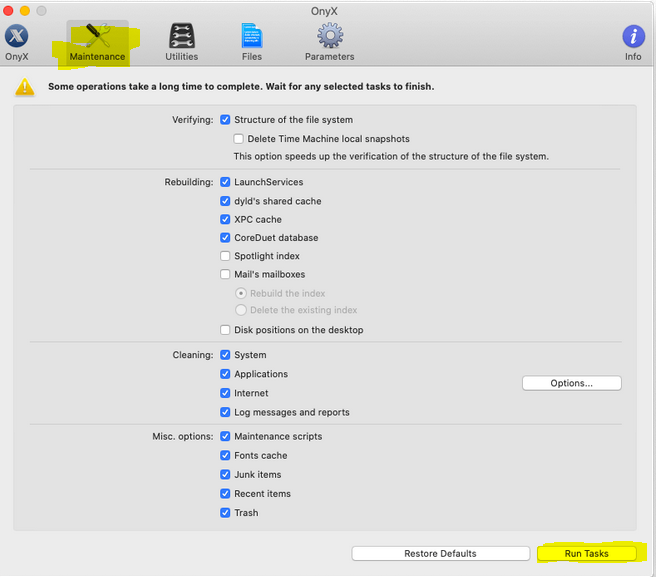
This is for newer Macs running MacOS
In the main program window select Automation (OS X) or Maintenance (MacOS), select "Execute" or "Run Tasks" to begin the cleaning process.
Once the cleaning process is complete your Mac will restart. Log back in after restart. This completes the cleaning process. Easy as!
Next we will look at backing up your Mac.
Backup your Mac using Time Machine
Now for the easy part. Get yourself a USB portable hard drive (small 2.5" form factor type) with enough storage capacity for backing up your Mac. Typical USB hard drives come in 1TB to 4TB storage capacity. Optionally you can create two partitions on your USB hard drive, one partition dedicated for Time Machine and the other partition for general storage. I will not get into how to partition your USB hard drive in this article.
Plug your USB hard drive into the Mac. If this is the first time it has been plugged in MacOS will ask if you would like to use it for Time Machine, select yes. Time Machine will setup the drive and start the first backup. Depending on the size of your Mac's hard drive the backup may take quite awhile to complete as everything needs to be copied to the USB hard drive. Future backup sessions will not take as long.
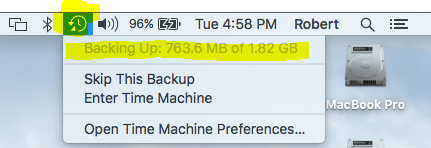
Time Machine starts the backup process automatically.
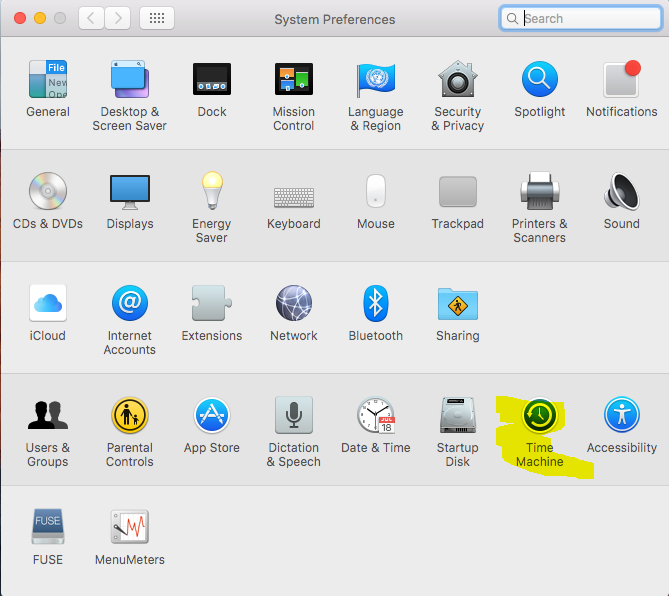
If this is not the first time you plugged in your USB hard drive or the option to assign the drive to Time Machine did not appear. Confirm that the USB hard drive is visible on the desktop. Next open System Preferences and select the Time Machine icon.
Select Time Machine icon in the System Preferences
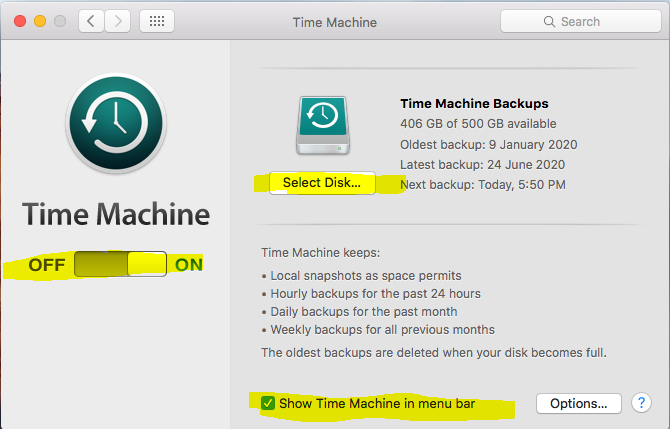
Turn on Time Machine, select checkbox "Show Time Machine in the menu bar" and then select the "Select Disk..." button.
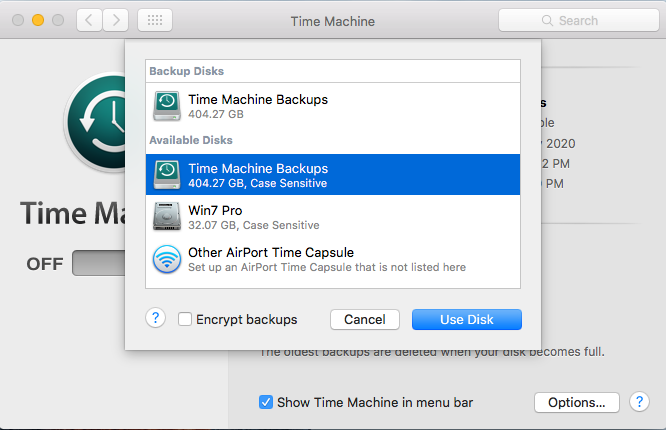
Find the USB hard drive in the list, select it and select the "Use Disk" button. You can now close the Time Machine window.
Select backup hard drive
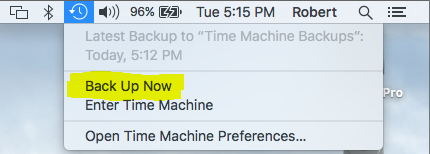
The backup should start automatically. If it does not you can start it manually from the menu bar.
Manually start a Time Machine backup
Once the backup is complete you can disconnect the USB hard drive from the Mac by either a right mouse click on the desktop USB hard drive icon and select Eject or drag and drop it into the Trash bin. The next time you plug it in Time Machine will automatically start a backup.
If you decide to leave the USB hard drive plugged in permanently, Time Machine will automatically schedule regular backups. However, it is a good idea to occationally check the USB hard drive to see if it is working and check if Time Machine is running backups.


