Email Attachments: Photo Files
Are you getting complaints from friends and family about the size of your emailed photo attachments?
Here is a solution:
- In your Pictures folder locate and select a photo(s) you want to email
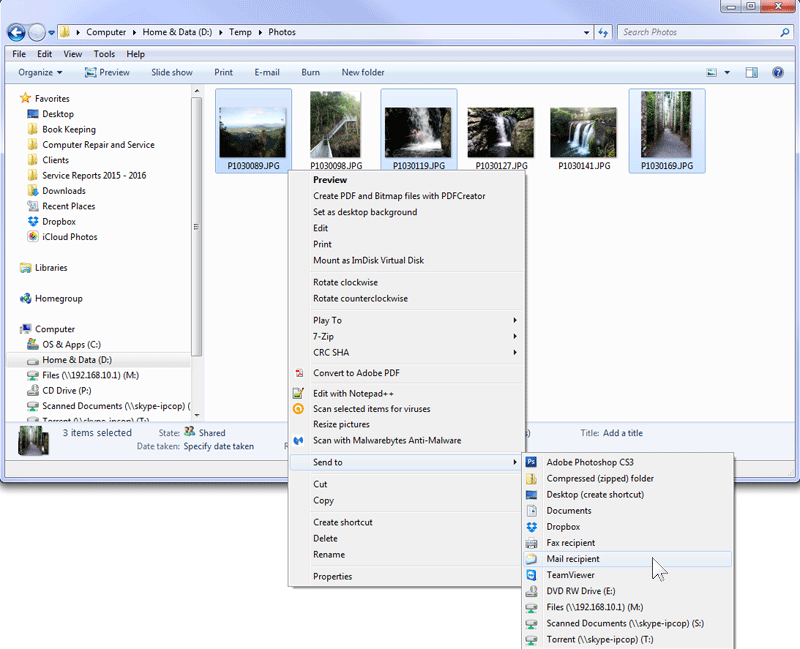
- Right mouse click on the selected photo(s) and select Send to -->> Mail recipient.
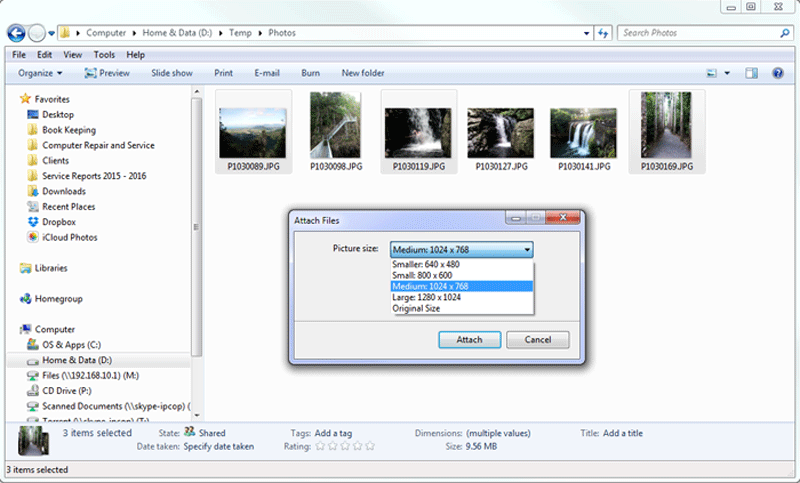
- Windows will prompt you with options to reduce the size of the photo(s) and will then attach them to a new email message.
This also works for other types of files such as Word documents, Excel spreadsheets, PDF documents, etc (no size reduction allowed for these file types).
Alternatively, try Image Resizer for Windows: https://imageresizer.codeplex.com/
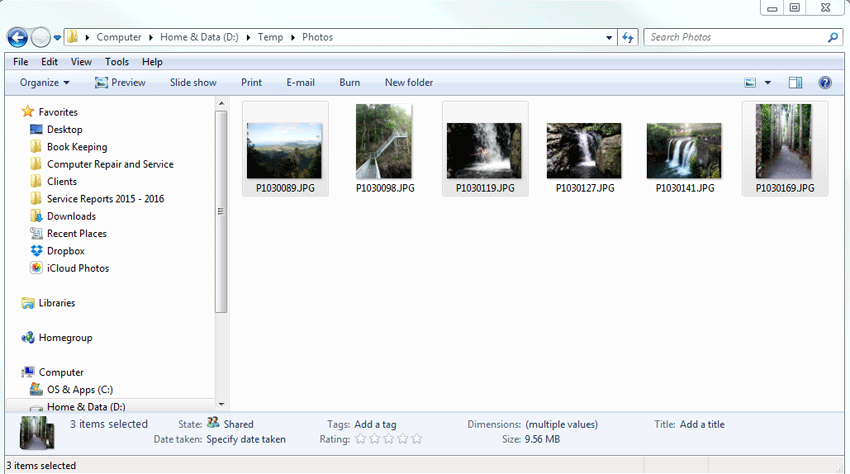
1. Select some photos in your Pictures folder:

Note the size of the selected files in the status bar (above). The three selected photos are 9.56MB in size.
2. Now send the selected photos to your email client program (Outlook, Thunderbird, Windows Live Mail, etc):

3. Choose the size of the photos to be attached to you email message:

In this example the three selected photos will be reduced in size to "large 1024x768".
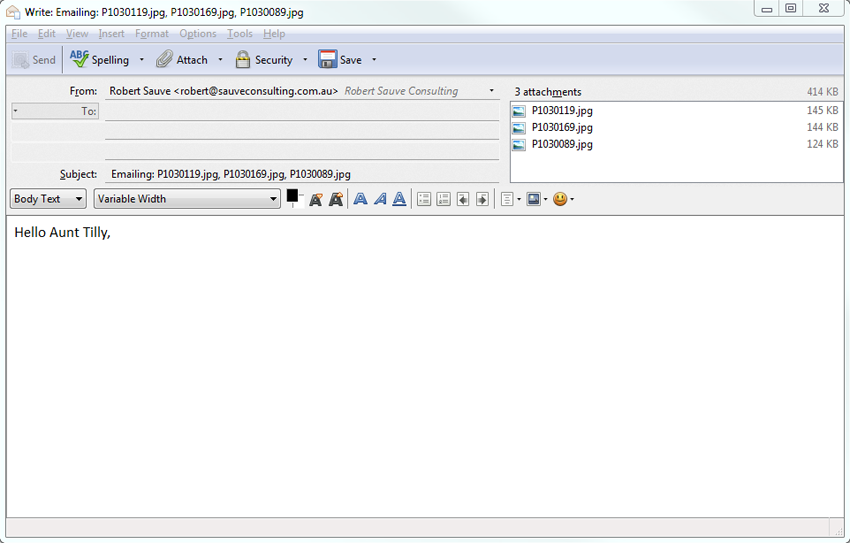
Photos are now attached and ready to send:
Look at the size difference between the original photos and the newly attached photos:
Original size: 9.56MB (9,560,000 Bytes)
Attached size: 414KB (414,000 Bytes)
Your email recipient will not notice a difference viewing the attached photos from the originals. However, If the recipient needs to print the photos in their original size it is better to deliver them in full size on DVD disc, usb flash drive or use a cloud service such as Dropbox, OneDrive or iCloud.

